How to change the default OS as Windows 7/8/10 in dual boot menu with Ubuntu 16.04/17.10
Dual-boot or even multi-boot Ubuntu with other operating systems? You may wish to change which OS starts as default in the Grub2 boot-loader.
If you’ve booted into Ubuntu, you can change the boot order via two ways:
- use Grub-Customizer, a graphical tool.
- configure Grub2 manually via a few commands.
Set Default OS by Manually configuring Grub:
For those who don’t wish to customize Ubuntu via third-party applications, open terminal from App Launcher or via Ctrl+Alt+T keys and do following steps:
All settings related to the GRUB2 will be stored in /etc/default/grub file. Whatever the changes you made in this file will be reflected to the GRUB2.
Make a backup of /etc/default/grub file before making any changes.
sudo cp /etc/default/grub /etc/default/grub.bak
1. First edit the configuration file via command:
gksudo gedit /etc/default/grub
Tip: for those who don’t have gksu, install it first via command:
sudo apt install gksu.
For Ubuntu Server, use the command below to edit the Grub configuration file:
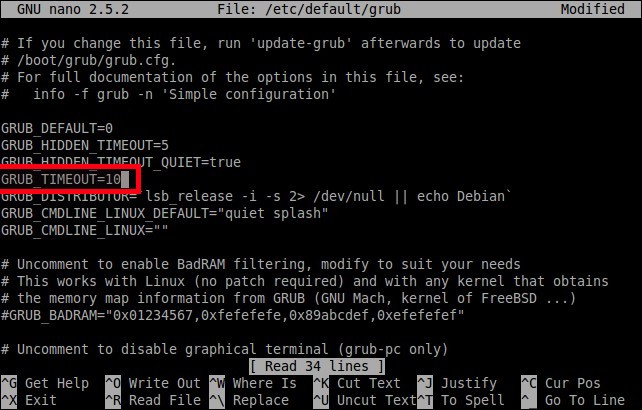
sudo nano /etc/default/grub
And save changes by pressing Ctrl+X, typing Y, and finally hitting Enter.
1. Select default OS (GRUB_DEFAULT)
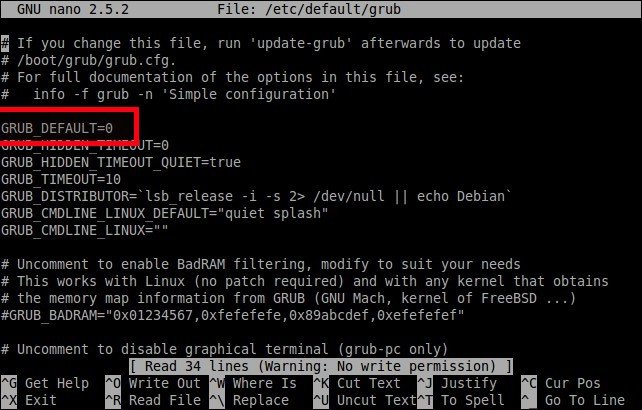
First line should be:
GRUB_DEFAULT=0
Change the value 0 with the position of your desired OS.
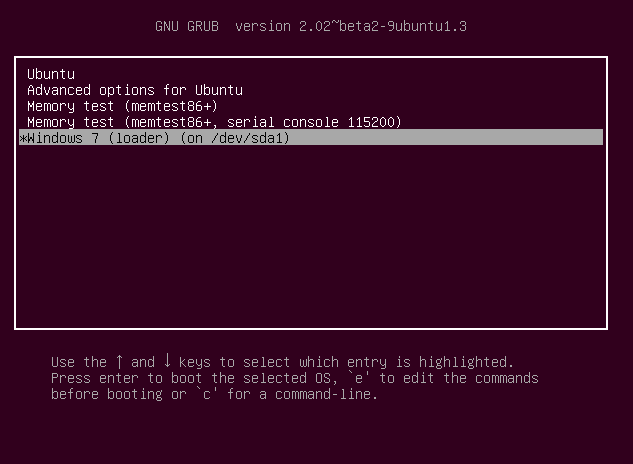
To find at which place your OS is, note at which position your OS is in, while in GRUB. Subtract one and you have your number.
Ex. In GRUB, if Windows is at 5th position, then replace 0 with 4.
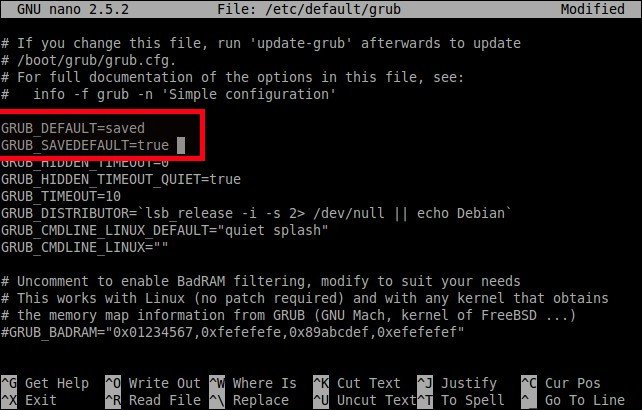
Also, if you have more than one OS in your system, you can boot the last operating system using the value GRUB_DEFAULT=saved. Whenever you reboot the system, the last operating system will start boot. Please note that you should add a line GRUB_SAVEDEFAULT=true to make this trick work.
Update grub to apply the configuration changes:
sudo update-grub
Finally set a default boot OS simply via command:
sudo grub-set-default NUMBER
Start counting boot entries from 0. In the top picture, the Windows Boot Manager is the fifth entry, so the NUMBER is 4.
2. Set OS timeout (GRUB_TIMEOUT)
By default, the selected entry from the boot menu will start to boot in 10 seconds.
You can increase or decrease this timeout setting. If the value is “0”, the default OS will immediately start to boot. If the value is “5” , the boot menu will appear for 5 seconds, so that you can select which OS you want to load when the system starts.
Change boot-order via Grub-Customizer:
Grub-Customizer is graphical tool to configure Grub2 / Burg settings. Besides changing the boot order, it can also:
- add, remove, move boot entries.
- Change background image.
- Edit boot text font
- Add kernel parameters
- reinstall grub into MBR (MicroSoft Boot Loader)
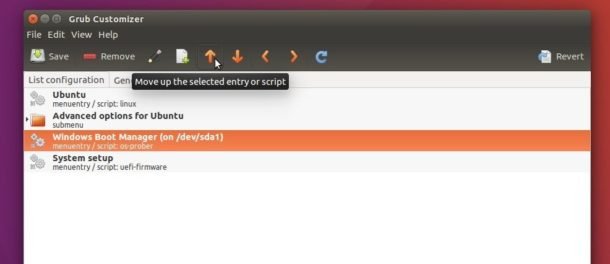
To install the software, open terminal, and run the commands below one by one to get it from PPA:
sudo add-apt-repository ppa:danielrichter2007/grub-customizer
sudo apt-get update
sudo apt-get install grub-customizer
The first command may ask you to type in password. Just type in mind since there’s no visual feedback and hit Enter.
For those who don’t want to add PPA, grab grub-customizer_xxx_i386/amd64.deb package (amd64 for 64bit, i386 for 32bit) from link below:
And click install the .deb package via Ubuntu Software.
That’s all folks. If you find this guide helpful, please share it on your social and professional networks.
Cheers!


![MySQL is not running on AMPPS (3.8) in Windows 10 [Solution]](https://blog.tawfiq.me/wp-content/uploads/2019/11/MySQL-is-not-running-on-AMPPS-3.8-in-Windows-10-Solution-768x292.png)

