How to create and add a subdomain on Godaddy managed WordPress hosting (Step by Step)
Step 1: Login to your Godaddy Account
Step 2: Go to Account > My Products
Step 3: Managed WordPress section > Manage All

Step 4: Create a New Site. Click on Create Site button.

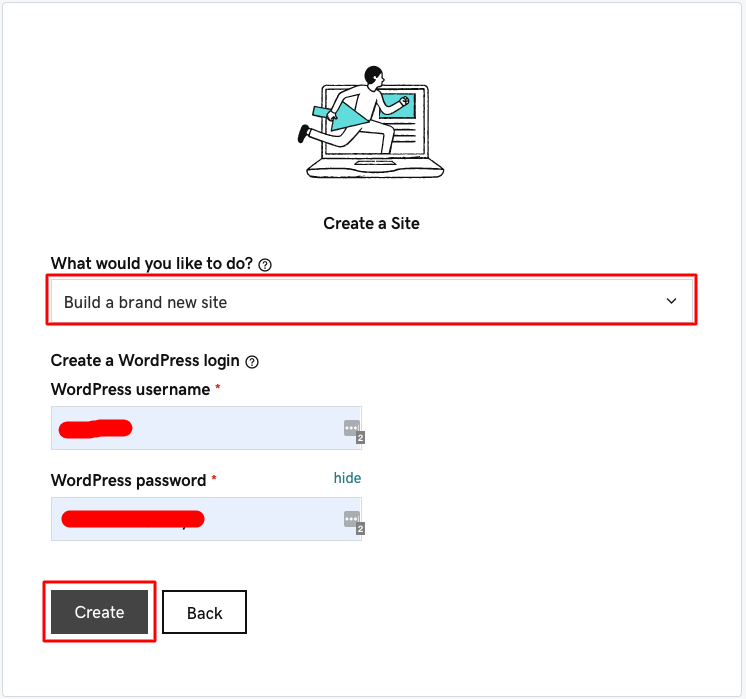
Step 5: Create a Site window
- What would you like to do?: Build a brand new site
- WordPress username: your username
- WordPress password: your password
- Click on Create button

Select a region and click on Continue button


Step 6: After completing your site setup. Click on Explore Hosting Dashboard

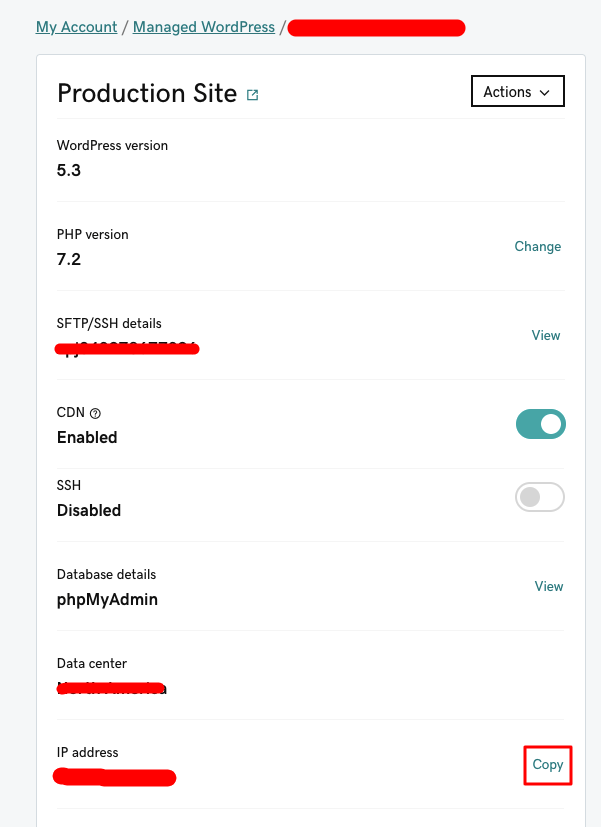
Step 7: From the Production Site section scroll down and look for IP address and copy the IP address (click on the copy text to copy the address) for later use.

Step 8: Now we add a new subdomain name by adding a DNS record. From Domains section click Manage All

Step 9: Click on “…” button showing beside the domain name you want to create a subdomain for. It’ll show a submenu then click on Manage DNS

Step 10: Add a new A-type DNS record by clicking the ADD button below.

Step 11: Add new DNS record form.
- Type: from Dropdown Select A
- Host: type the name you want to prefix your domain name.
For example, if you want to create a subdomain name dev.yourdomainname.com just put dev in the Host box no need to write the entire subdomain name. - Points to: paste the IP address you copied in step 7
- TTL: default value 1 Hour will be ok
- Click Save

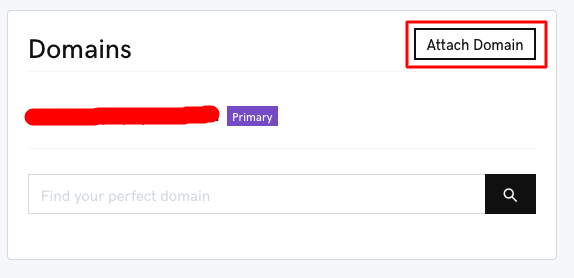
Step 12: Now to goto Domain Overview page again (same page as step 7, from where you copied the IP address ). Click Attach Domain on Domains section.

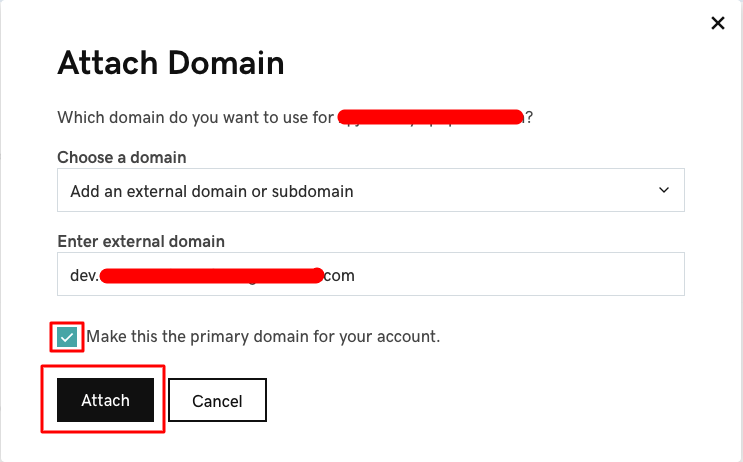
Step 13: Attach Domain window
- Choose a domain: Add an external domain or subdomain
- Enter external domain: write your subdomain name, for example, dev.yourdomainname.com
- Make this the primary domain for your account: Check the box
- Click Attach button

Step 14: Type your subdomain name in a new browser tab and you should see the same website you have created in Step 6.

Done, you have successfully added a subdomain in your Godaddy Managed WordPress Hosting.


